
대제목으로 적을수 있습니다.
현재 jekyll로 구성된 문법 확인중인데 정말 잘만들것 같다. Rubby 공부를 시작해야겠다.
강조를 할때 이렇게 저의 깃허브 주소는.
앞으로 블로그 내역을 추가할거
- 백팩킹
- 등산
- 캠핑
- 이야기
- 자전거
- 하이킹
- 보드게임
- 레고
- 키보드
And:
- 백팩킹
- 등산
- 캠핑
- 이야기
- 자전거
- 하이킹
- 보드게임
- 레고
- 키보드
앞으로 다양한 이야기를 적어야겠다 깃블로그 시이작
“처음에는 우리가 습관을 만들지만 그다음에는 습관이 우리를 만든다. -존 드라이든-”
“길을 아는 것과 그 길을 걷는 것은 분명히 다르다. -모피어스, <영화 매트릭스="">-”
“말을 많이 한다는 것과 잘한다는 것은 별개이다. -소포클레스-”
“내가 맞을땐 아무도 기억 못하는데 내가 틀렸을 땐 다 기억한다. -작가미상-”
“하고 싶은 일을 하기 위해 해야 하는 일을 하지 않으면 안된다. -도슨트, 윤우중-”
“내게 오는 사람들을 진정으로 대하라. 돈은 덤으로 온다. 내게 온 사람을 통해 돈을 벌려하면 인연도 끊어지고 돈도 떠난다. -작가미상-”
var a = 1;
var b = 2;
function sum (num1,num2){
  return num1+num2;
}
var result = sum(a,b);
윈도우서버에서 백업정책 만들기
소스백업시 고려해야할 사항
서버의 용량을 체크한다. 백업 기준을 잡는다. 로컬에서 몇일, 배업할 대상의 서버에서는 몇일 동안진행할지
윈도우 서버에서 bat파일 후 스케줄러를 통한
For Example :
- use this
$$E=mc^2$$
You should be able to see it in your post as: \(E=mc^2\)
use $$mean = \frac{\displaystyle\sum_{i=1}^{n} x_{i}}{n}$$ to write :
- Use
k_{n+1} = n^2 + k_n^2 - k_{n-1}to write
Adding Multiple Categories in Posts
To add categories in blog posts all you have to do is add a category key with category values in frontmatter of the post :
---
category: ['jekyll', 'guides', 'sample_category']
---
Then to render this category using link and pages. All we need to do is,
-
Create a new file with [your_category_name].md inside categories folder.
-
Copy categories/sample_category.md file and replace the content in [your_category_name].md in that. (Please don’t copy the code below its just sample, since it renders the jekyll syntax dynamically)
---
layout: page
title: Guides
permalink: /blog/categories/your_category_name/
---

<h5> Posts by Category : 깃블로그 시작을 알리며 ( 템플릿 모음 - 이걸로 구분진행 ) </h5>

<div class="card">

</div>
Using the category, all the posts associated with the category will be listed on http://localhost:4000/blog/categories/your_category_name
You’ll find this post in your _posts directory. Go ahead and edit it and re-build the site to see your changes. You can rebuild the site in many different ways, but the most common way is to run jekyll serve, which launches a web server and auto-regenerates your site when a file is updated.
To add new posts, simply add a file in the _posts directory that follows the convention YYYY-MM-DD-name-of-post.ext and includes the necessary front matter. Take a look at the source for this post to get an idea about how it works.
Jekyll also offers powerful support for code snippets:
def print_hi(name)
  puts "Hi, #{name}"
end
print_hi('Tom')
#=> prints 'Hi, Tom' to STDOUT.
or
var a = 1;
var b = 2;
function sum (num1,num2){
  return num1+num2;
}
var result = sum(a,b);
이곳에 데이터 입력진행하기
좌측 ESC밑에 특수 키
-> 해당내역으로 구분을 해지 진행
`이렇게는 강조를` 할수 있다.
layout: page title: Guides permalink: /blog/categories/your_category_name/ —
Posts by Category : 깃블로그 시작을 알리며 ( 템플릿 모음 - 이걸로 구분진행 )
Using the category, all the posts associated with the category will be listed on
`http://localhost:4000/blog/categories/your_category_name`


For Example :

- use this `$$E=mc^2$$`

You should be able to see it in your post as: $$E=mc^2$$

 use `$$mean = \frac{\displaystyle\sum_{i=1}^{n} x_{i}}{n}$$` to write :

$$mean = \frac{\displaystyle\sum_{i=1}^{n} x_{i}}{n}$$

- Use `k_{n+1} = n^2 + k_n^2 - k_{n-1}` to write

$$k_{n+1} = n^2 + k_n^2 - k_{n-1}$$


Then add this frontmatter to describe the author in **johndoe.md**.
```yml
---
name: John Doe # Name of the Author
username: johndoe # Username of the Author
bio: "Hi I a John, a Web Developer and Designer." # Author Bio
site: http://johndoe.com  # Author Website URL
avatar: johndoe.png  # Profile Image (img path will be /assets/img/authors/johndoe.png)
email: mail@johndoe.com  # Author Email address
social:  # Author Social profile links
    - title: "github"
      url: "https://github.com/johndoe"
    - title: "linkedin"
      url: "https://www.linkedin.com/in/johndoe"
    - title: "youtube"
      url: "https://www.youtube.com/channel/UCSfLBFFfNU9r6ihfei6VeJw"
    - title: "facebook"
      url: "https://www.facebook.com/johndoe"
    - title: "twitter"
      url: "https://www.twitter.com/bang7233"
    - title: "behance"
      url: "https://behance.com/johndoe"
    - title: "instagram"
      url: "https://instagram.com/johndoe"
    - title: "medium"
      url: "https://medium.com/johndoe"
    - title: "telegram"
      url: "https://telegram.com/johndoe"
    - title: "dribbble"
      url: "https://dribbble.com/johndoe"
    - title: "flickr"
      url: "https://flickr.com/johndoe"
---
You can create multiple authors similarly under _authors
Next, copy the same frontmatter in _data/authors.yml (under individual author usernames) like this :
# Author 1
johndoe:
   name: John Doe
   username: johndoe
   site: http://johndoe.com
   avatar: johndoe.png
   bio: "Hi I a John, a Web Developer and Designer."
   email: mail@johndoe.com
   social:
      - title: "github"
        url: "https://github.com/johndoe"
      - title: "linkedin"
        url: "https://www.linkedin.com/in/johndoe"
      - title: "youtube"
        url: "https://www.youtube.com/channel/UCSfLBFFfNU9r6ihfei6VeJw"
      - title: "facebook"
        url: "https://www.facebook.com/johndoe"
      - title: "twitter"
        url: "https://www.twitter.com/johndoe"
      - title: "behance"
        url: "https://behance.com/johndoe"
      - title: "instagram"
        url: "https://instagram.com/johndoe"
      - title: "medium"
        url: "https://medium.com/johndoe"
      - title: "telegram"
        url: "https://telegram.com/johndoe"
      - title: "dribbble"
        url: "https://dribbble.com/johndoe"
      - title: "flickr"
        url: "https://flickr.com/johndoe"

# Author 2
janedoe:
   name: Jane Doe
   username: janedoe
   site: https://janedoe.com
   avatar: jane.png
   bio: "Designer"
   email: mail@janedoe.com
   social:
      - title: "github"
        url: "https://github.com/janedoe"
      - title: "linkedin"
        url: "https://www.linkedin.com/janedoe"
      - title: "youtube"
        url: "https://www.youtube.com/channel/UCSfLBFFfNU9r6ihfei6VeJw"
      - title: "facebook"
        url: "https://www.facebook.com/janedoe"
Likewise ! This will be helpful for the widgets. (About Author, Recent Articles).
Adding Author to Post
When creating a new post, just add the author in frontmatter using the username of the author
For eg, In 2020-10-24-demo-article.md
---
layout: post
title: "Demo Article"
author: janedoe
---
This is Jane Doe's Article
Now there will be Authors widget in Blog Sidebar, showing all authors like this :
Also a Author Profile Page will be created for Jane Doe to showcase her written articles.
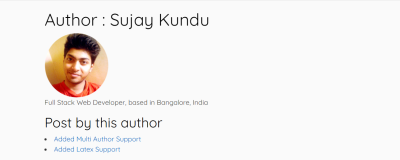
Also, below this article you can see the Author Profile Card , who has written the article too ! ;)
Cheers ! Hope You enjoy this new feature. :D